

Driving Digital Performance for a Digital Media Brand
Headless CMS scales and improves WPWhiteBoard’s content distribution, flexibility, and personalization
Ankita Deb
Sanity Studio has quickly become a go-to choice for developers and content teams who want a powerful and adaptable CMS. It is an open-source platform that empowers you to create a content management experience tailored to your needs, all while integrating smoothly with modern development workflows. But let’s break that down—what exactly is Sanity Studio, and why should it matter to you?
Picture Sanity Studio as your customizable content command center. It’s a single-page application built with React, a tool developers use for crafting smooth, interactive interfaces. What I find fascinating is how it lets developers define content models using JavaScript or TypeScript.
In simpler terms, you get to set the rules for how your content, like blog posts, images, or product details, is structured, all through code. Once you’ve done that, Sanity Studio takes over and automatically builds an editing environment that’s intuitive for content creators.
Sanity Studio comes with handy features like document versioning, so you can see how your content evolves over time, and real-time collaboration, which lets your team work together seamlessly, seeing updates as they happen. Want to dig into the nitty-gritty?
Another big plus is that it’s open-source. It’s a stark contrast to monolithic systems like WordPress, which, while amazing for many projects, can feel restrictive when you need deep customization or scalability. With Sanity Studio, you’ve got the freedom to mold it to your project’s needs, and there’s a community of contributors keeping it fresh and evolving.
Sanity Studio is like a toolkit designed to make content management feel effortless and adaptable. Whether you’re a developer building complex systems or a content creator who needs an intuitive interface, its features are crafted to meet both ends of the spectrum.
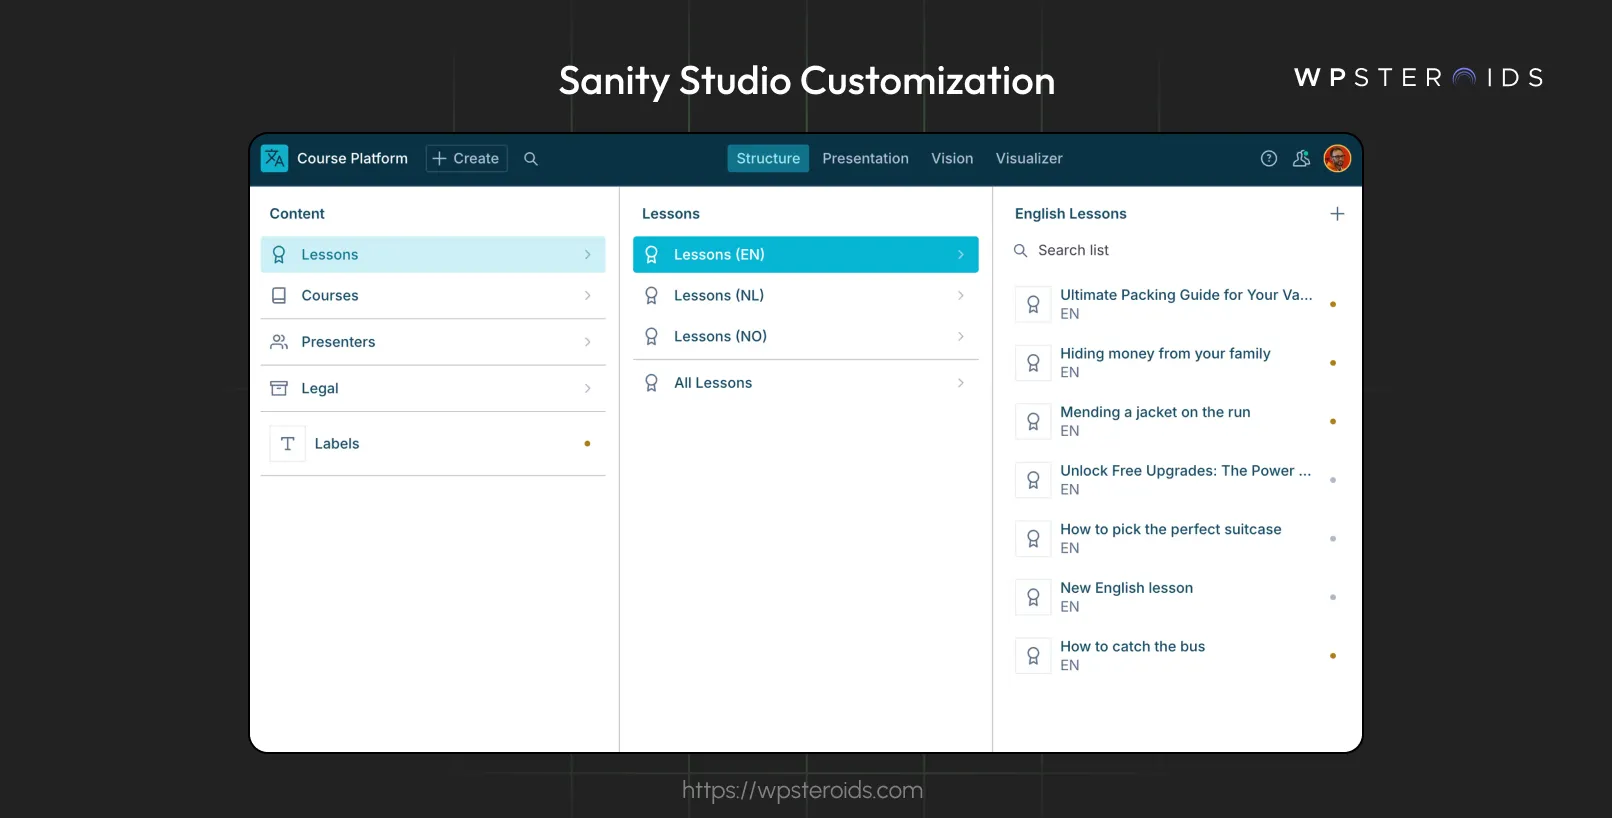
One of the first things I noticed about Sanity Studio is how much control it gives you over the editing experience. Imagine being able to tweak every part of the user interface to fit your project’s exact needs—that’s what Sanity Studio offers.
Using an API and React components, you can customize everything from the layout to the input fields. This means you’re not stuck with a one-size-fits-all dashboard; instead, you can create an environment that feels like it was built just for your team.
Whether you need to add custom forms or integrate unique workflows, the flexibility is there. It’s like having a CMS that grows and evolves with your project.
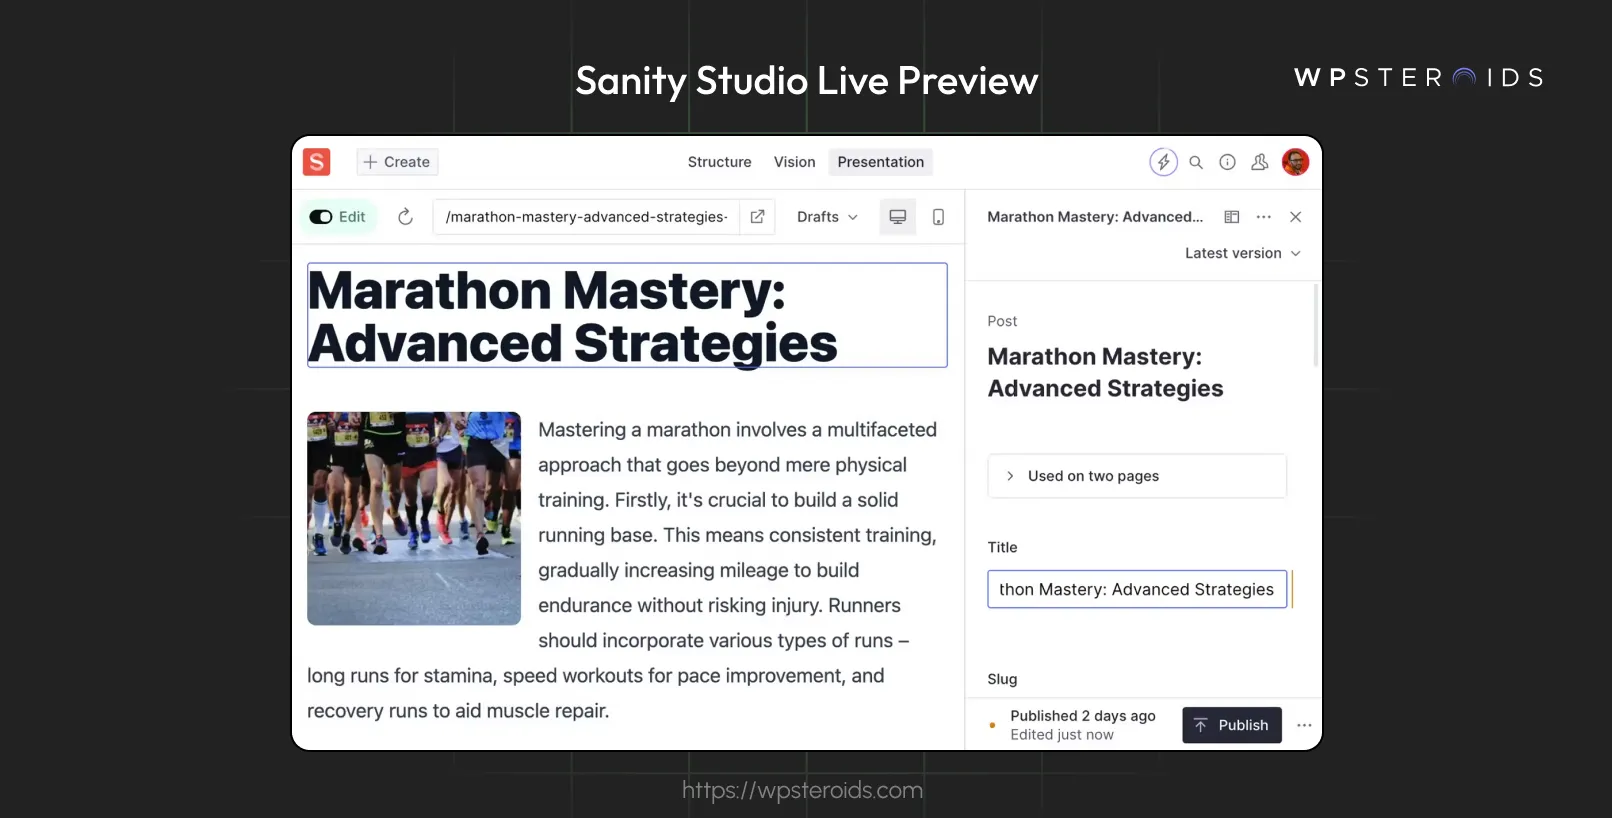
Now, let’s talk about one of my favorite features: the live preview, or as it’s often referred to, "Sanity Studio preview." This is a live-updating, interactive preview that shows you exactly how your changes will look on the front end, as you make them.
It’s like having a mirror that reflects your content in real-time. Why is this a game-changer? Because it cuts down on the back-and-forth between editing and reviewing. In fact, Sanity claims it can reduce review cycles by half, which means less time spent on revisions and more time creating.
If you’ve ever been frustrated by having to publish content just to see how it looks, this feature will feel like a breath of fresh air.
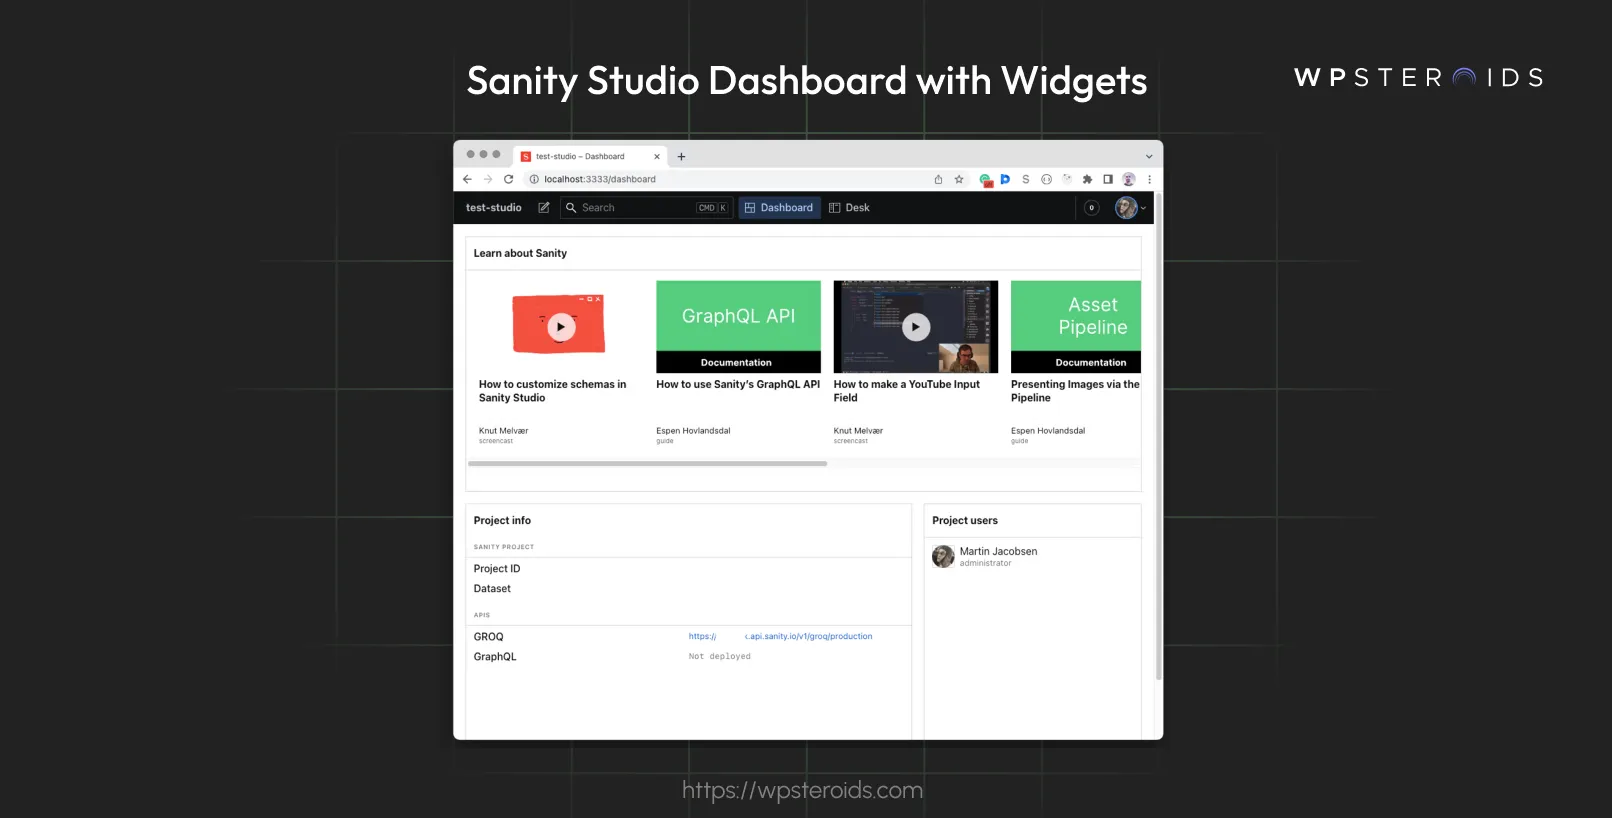
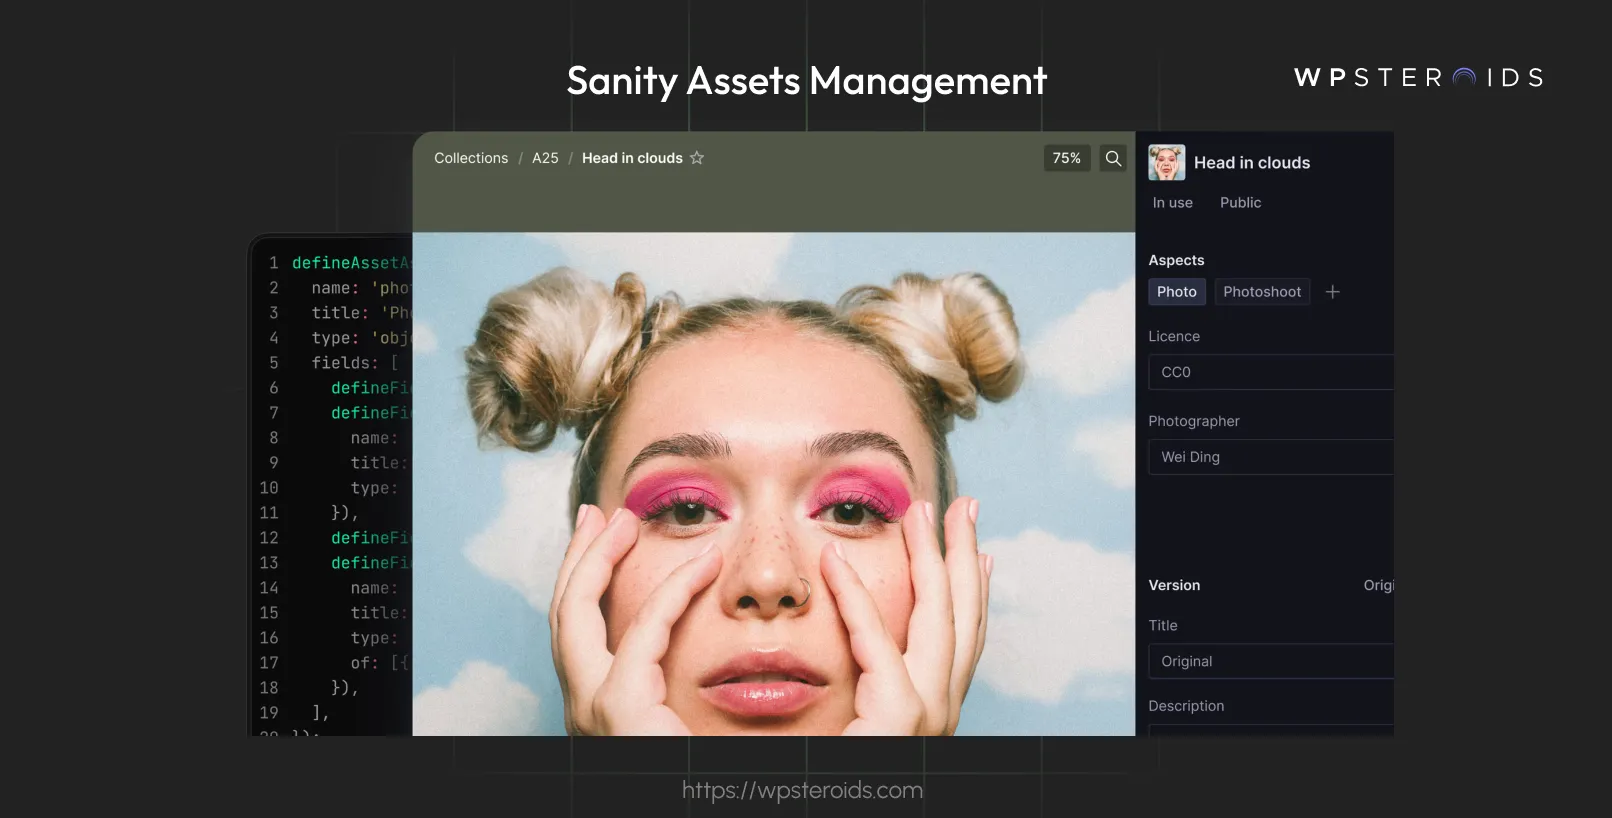
Managing media can be a headache in many CMS platforms, but Sanity Studio makes it surprisingly smooth. It offers a centralized media library where all your assets—like images, videos, and documents—are stored and optimized via a global CDN.
That means your content loads quickly, no matter where your audience is located. Plus, because everything is in one place, you can easily reuse assets across different parts of your site or app without uploading duplicates.
It’s efficient and keeps things organized, which is a huge plus for larger projects.
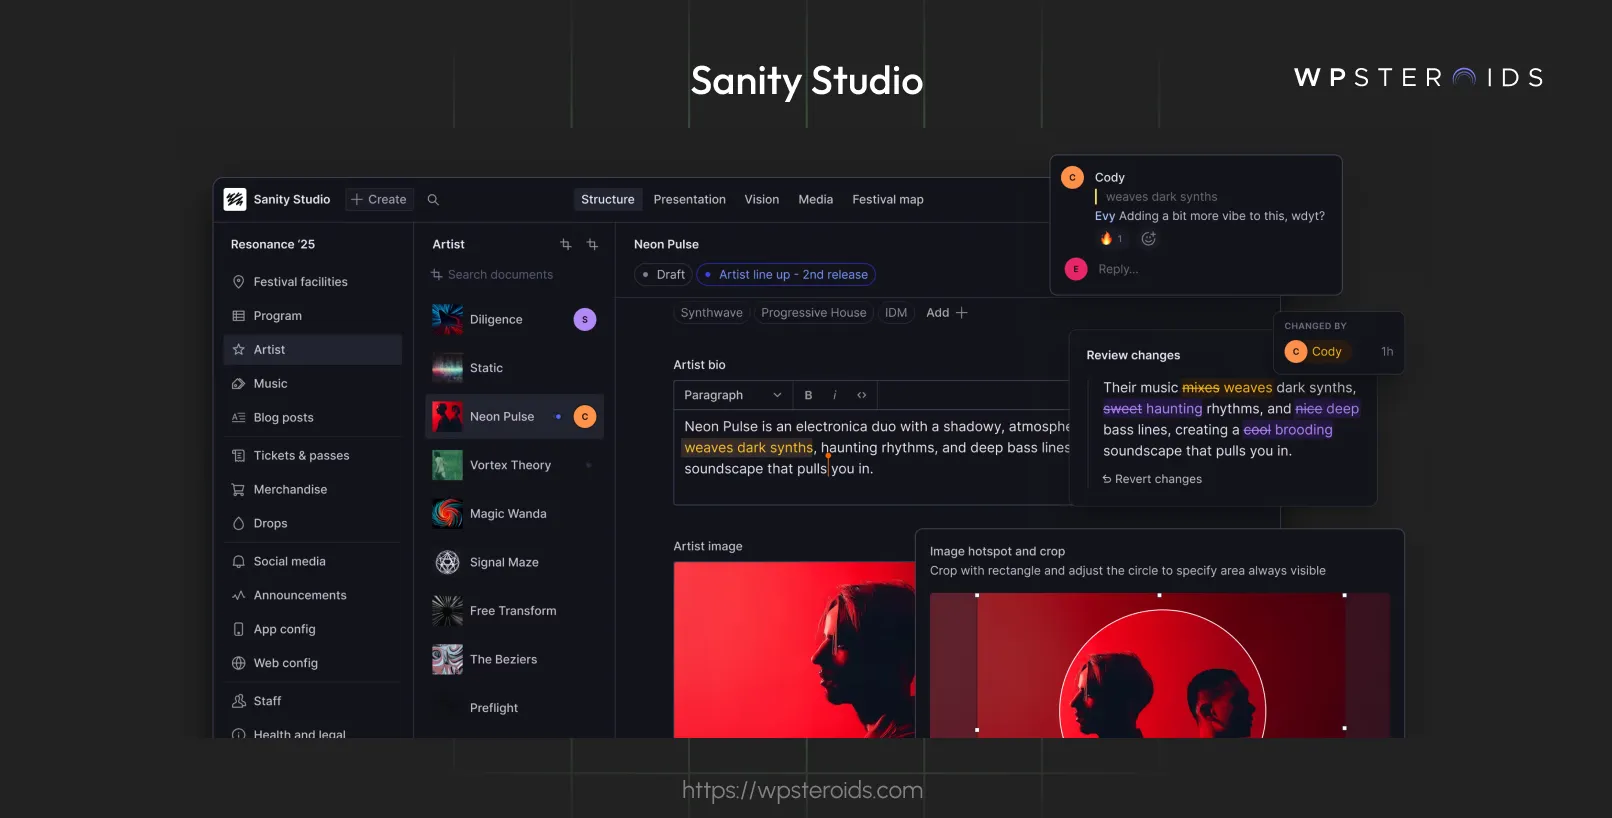
If you’ve ever worked on a project with multiple people, you know how tricky it can be to keep everyone on the same page—literally. That’s where Sanity Studio’s real-time collaboration shines. It allows multiple users to edit content simultaneously, with changes syncing instantly.
Think of it like working together in a shared document, but for your entire CMS. And don’t worry about losing track of who did what—every change is versioned, so you can easily see the history and revert if needed. It’s a feature that not only saves time but also reduces the risk of errors.
Content isn’t always just plain text, and Sanity Studio gets that. That’s why it uses something called Portable Text, which lets you create rich, formatted content—like bold text, links, or embedded media—while keeping everything structured behind the scenes.
This is perfect for developers who need clean, predictable data and content creators who want the freedom to style their work. It’s like having the flexibility of a word processor with the organization of a database.
This makes collaboration and tracking changes a breeze. Plus, with tools like TypeGen, you get auto-generated TypeScript types for your content, ensuring everything stays consistent.
And if you need to enforce specific rules, custom validation lets you set boundaries for what content can be entered. It’s all about making development smoother and more efficient.
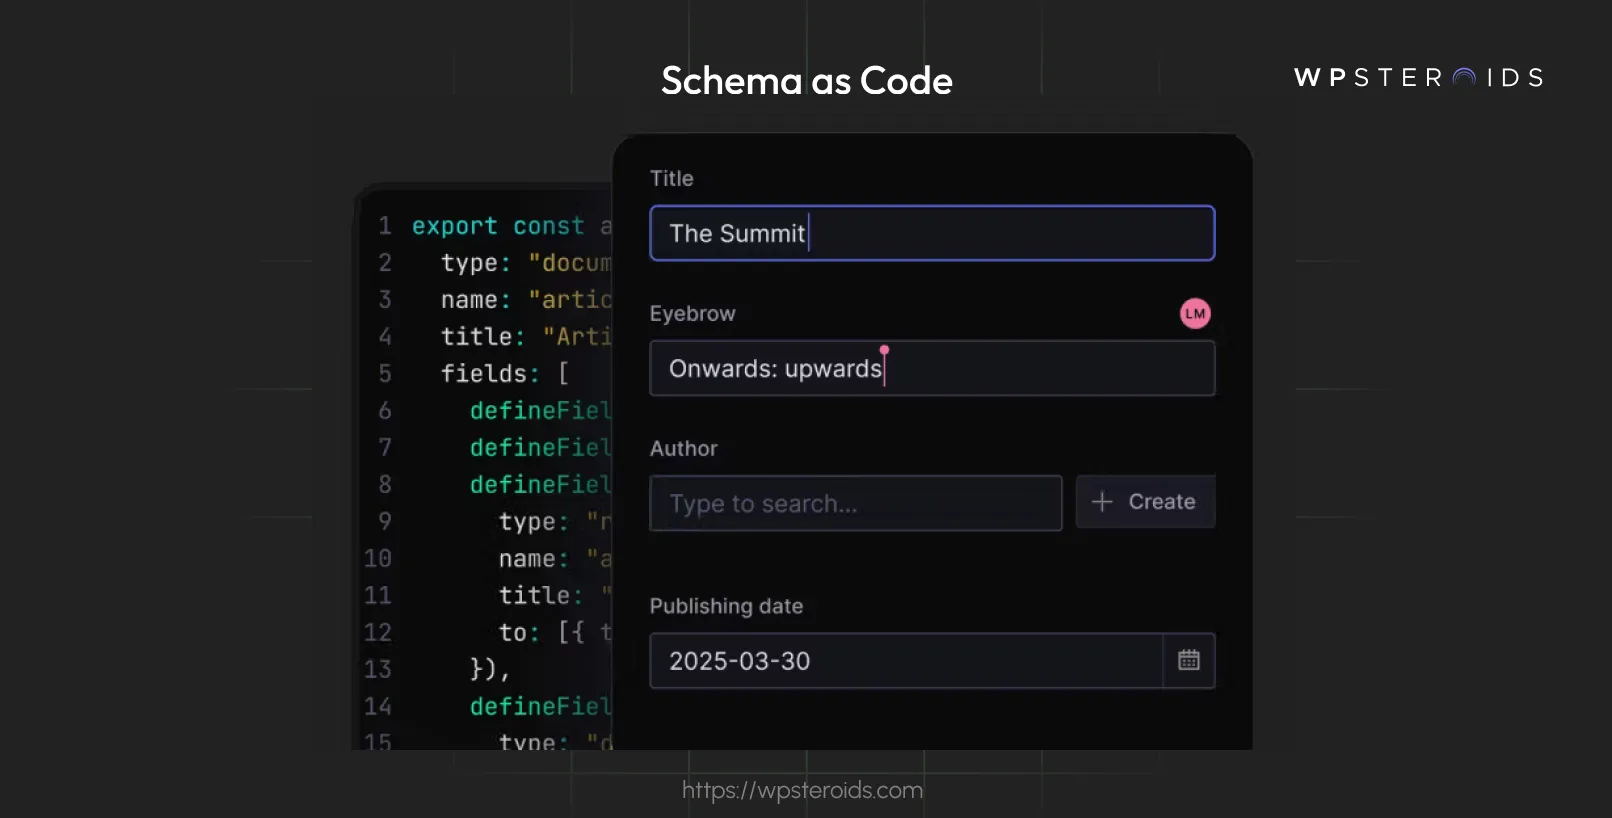
Sanity Studio is a powerful CMS that fits seamlessly into your development process. Whether you’re managing content schemas, deploying updates, or pulling data into a front-end app, it’s designed to work with the tools you already use.
Sanity Studio defines your content structure (the schema) in code, typically JavaScript or TypeScript. This means you can manage it with Git, just like your application code. It’s perfect for tracking changes, collaborating with a team, and keeping everything consistent across environments.
Step 1: Initialize a Git Repository
Start by setting up a Git repository in your Sanity Studio project folder. Open your terminal, navigate to the folder, and run:
git initThis creates a new Git repository to track your files.
Step 2: Add Your Schema Files
Your schema is usually in files like `schema.js` or a `schemas/` directory. Add these to your repository:
git add schema.jsStep 3: Commit Your Changes
When you update your schema (e.g., adding a new field), commit the changes with a clear message:
git commit -m "Add author field to blog post schema"Step 4: Collaborate with Your Team
Push your changes to a remote repository (like GitHub) so your team can access them:
git push origin mainStep 1: Create a Workflow File
In your Git repository, create a file at `.github/workflows/deploy.yml`.
Step 2: Define the Workflow
Add this code to automate deployment when you push to the `main` branch:
name: Deploy Sanity Studio
  on:
    push:
      branches:
        - main

  jobs:
    deploy:
      runs-on: ubuntu-latest
      steps:
        - uses: actions/checkout@v2
        - name: Deploy to Sanity
          run: sanity deploy
          env:
            SANITY_AUTH_TOKEN: ${{ secrets.SANITY_AUTH_TOKEN }}
This workflow checks out your code and runs `sanity deploy` to push your Studio to Sanity’s hosting.
Step 3: Set Up Secrets
Go to your GitHub repository settings, under “Secrets,” and add a new secret named `SANITY_AUTH_TOKEN`. Get this token from your Sanity project dashboard.
Step 4: Push and Deploy
Push your changes to the `main` branch, and GitHub Actions will handle the deployment.
This basic setup ensures your Studio updates go live automatically.
Step 1: Install the Sanity Client
In your Next.js project, install the Sanity client package:
npm install @sanity/clientStep 2: Set Up the Client
Create a file like `lib/sanity.js` to configure the client:
import sanityClient from '@sanity/client';
export const client = sanityClient({
  projectId: 'your-project-id', // Replace with your Sanity project ID
  dataset: 'production',
  useCdn: true, // Use the CDN for faster responses
});
Step 3: Write a GROQ Query
Define a query to fetch blog posts. Add this to your component:
  const query = `*[_type == "post"] {
    title,
    slug,
    publishedAt
  }`;
Step 4: Fetch and Display the Data
Use the client to fetch data and render it in your component:
  import { useEffect, useState } from 'react';
  import { client } from '../lib/sanity';

  export default function Blog() {
    const [posts, setPosts] = useState([]);

    useEffect(() => {
      client.fetch(query).then((data) => setPosts(data));
    }, []);

    return (
      <ul>
        {posts.map((post) => (
          <li key={post.slug.current}>{post.title}</li>
        ))}
      </ul>
    );
  }
This fetches and displays a list of blog post titles.
For projects with multiple environments (e.g., development, staging, production), you can use environment variables to switch datasets in Sanity Studio.
Step 1: Define Environment Variables
In your `sanity.json` file, use an environment variable for the dataset:
{
    "api": {
      "projectId": "your-project-id",
      "dataset": "${process.env.SANITY_DATASET || 'production'}"
    }
  }
This defaults to `production` if no variable is set.
Step 2: Set Variables for Each Environment
Run your Studio with the appropriate dataset:
SANITY_DATASET=development sanity startSANITY_DATASET=staging sanity deploySANITY_DATASET=production sanity deployThis keeps your environments separate without code changes.
While traditional platforms like WordPress have been around for years and are incredibly popular, newer headless CMS options like Sanity Studio are gaining traction for their flexibility and developer-friendly features
But how do they really compare? And when should you choose one over the other?
Feature | Sanity Studio | WordPress (Gutenberg) | Strapi | Contentful |
|---|---|---|---|---|
| Customization Level | High (React-based, fully customizable) | Medium (block-based, limited to predefined blocks) | High (open-source, customizable admin panel) | High (through App Framework and custom apps) |
| User Experience | Minimalistic and intuitive | User-friendly, especially for beginners | Straightforward, but can be technical | Clean and intuitive, with drag-and-drop features |
| Real-time Collaboration | Yes | Limited (requires plugins) | No | Yes |
| Ease of Use for Non-Technical Users | Good, but might require some training | Excellent | Moderate (requires some technical understanding) | Good, with a focus on content editors |
| Integration Capabilities | Excellent, with a wide range of plugins and APIs | Good, with a vast ecosystem of plugins | Good, with support for various databases and APIs | Excellent, with a wide range of integrations and extensions |
Now, let’s talk about when Sanity Studio could be a better choice.
Each platform has its strengths, but if you’re looking for a balance of flexibility, scalability, and developer-friendly tools, Sanity Studio is hard to beat.
Sanity Studio is already a great CMS out of the box, but its real magic lies in how much you can customize it to fit your project’s unique needs. Whether you’re a developer looking to integrate external data, a content strategist aiming to streamline workflows, or a designer wanting to align the Studio’s look with your brand, advanced customization opens up a world of possibilities.
As we close out this exploration of Sanity Studio, it’s hard not to feel excited about what it brings to the table. With its standout customization, real-time collaboration, and smooth integration into your workflow, it’s more than just a CMS—it’s a creative partner that adapts to your vision.
Here’s the bottom line: whether you’re building something small or dreaming big, Sanity Studio is ready to grow with you. Why not take it for a spin and see where it takes you?


