

Driving Digital Performance for a Digital Media Brand
Headless CMS scales and improves WPWhiteBoard’s content distribution, flexibility, and personalization
Sahil Mahalley
Moving your content to Contentful is like relocating to a new house: it's an opportunity to correct what went wrong previously and position yourself for the future.
Why make the switch? Perhaps you want to escape from outdated, cumbersome systems, consolidate all your content in one location, or simplify sharing content between devices and channels.
But like moving home, it's not all good. You'll have to be careful not to lose data, disrupt workflows, or have the same issues in a new system.
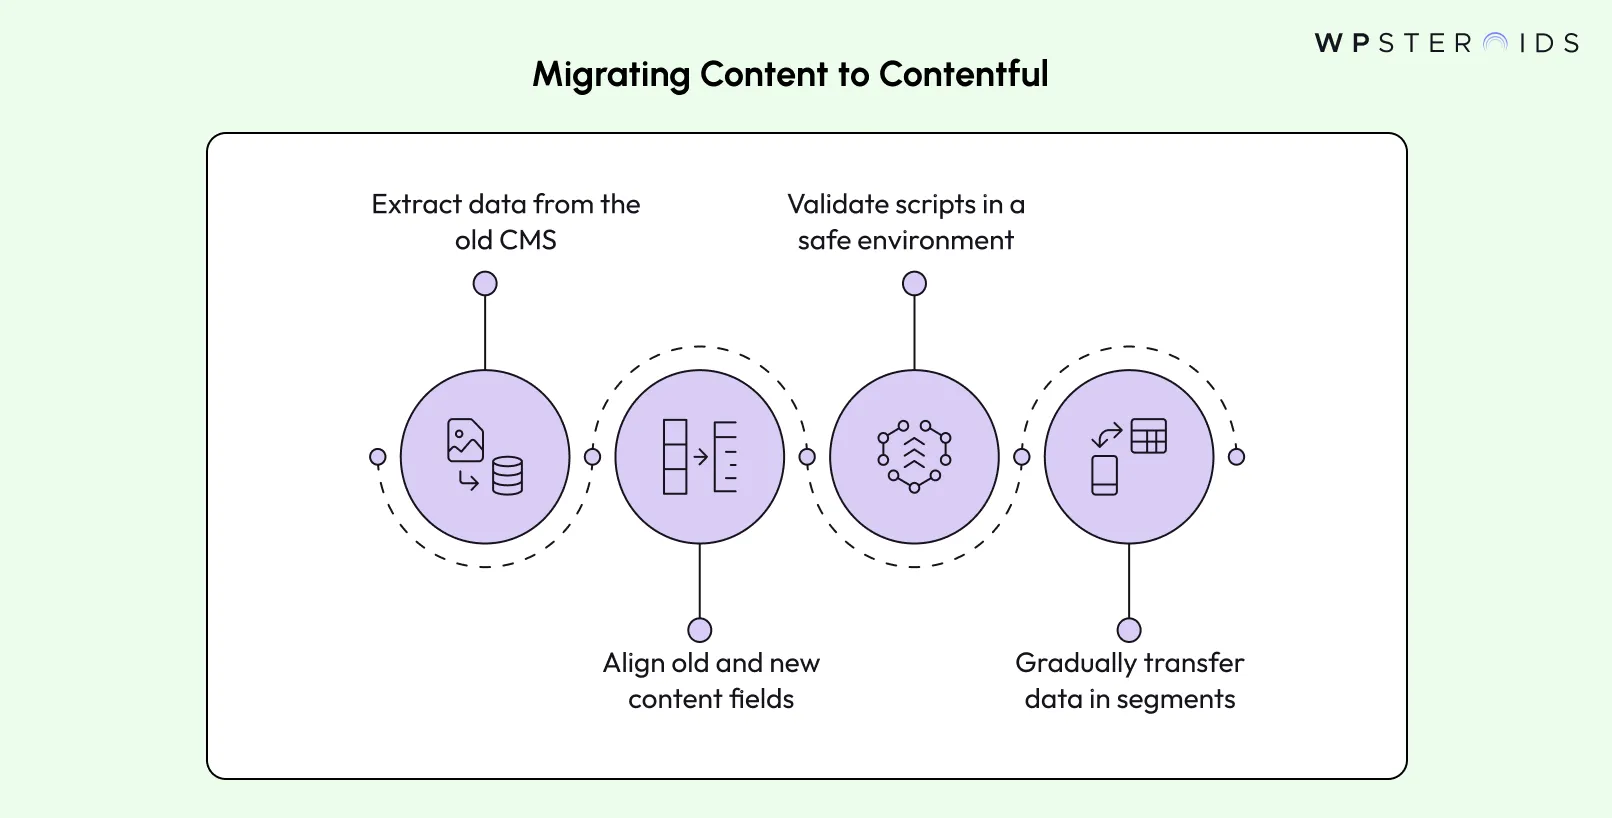
Before you dive into the execution of your Contentful migration for your current content, there are a few things you need to attend to.
Start by taking stock of everything you have. How much content is there? What’s actually useful? Maybe old blog posts can stay, but outdated product pages should go.
This is also your chance to fix past mistakes, like messy SEO tags or slow editorial processes, and align your content with new goals.
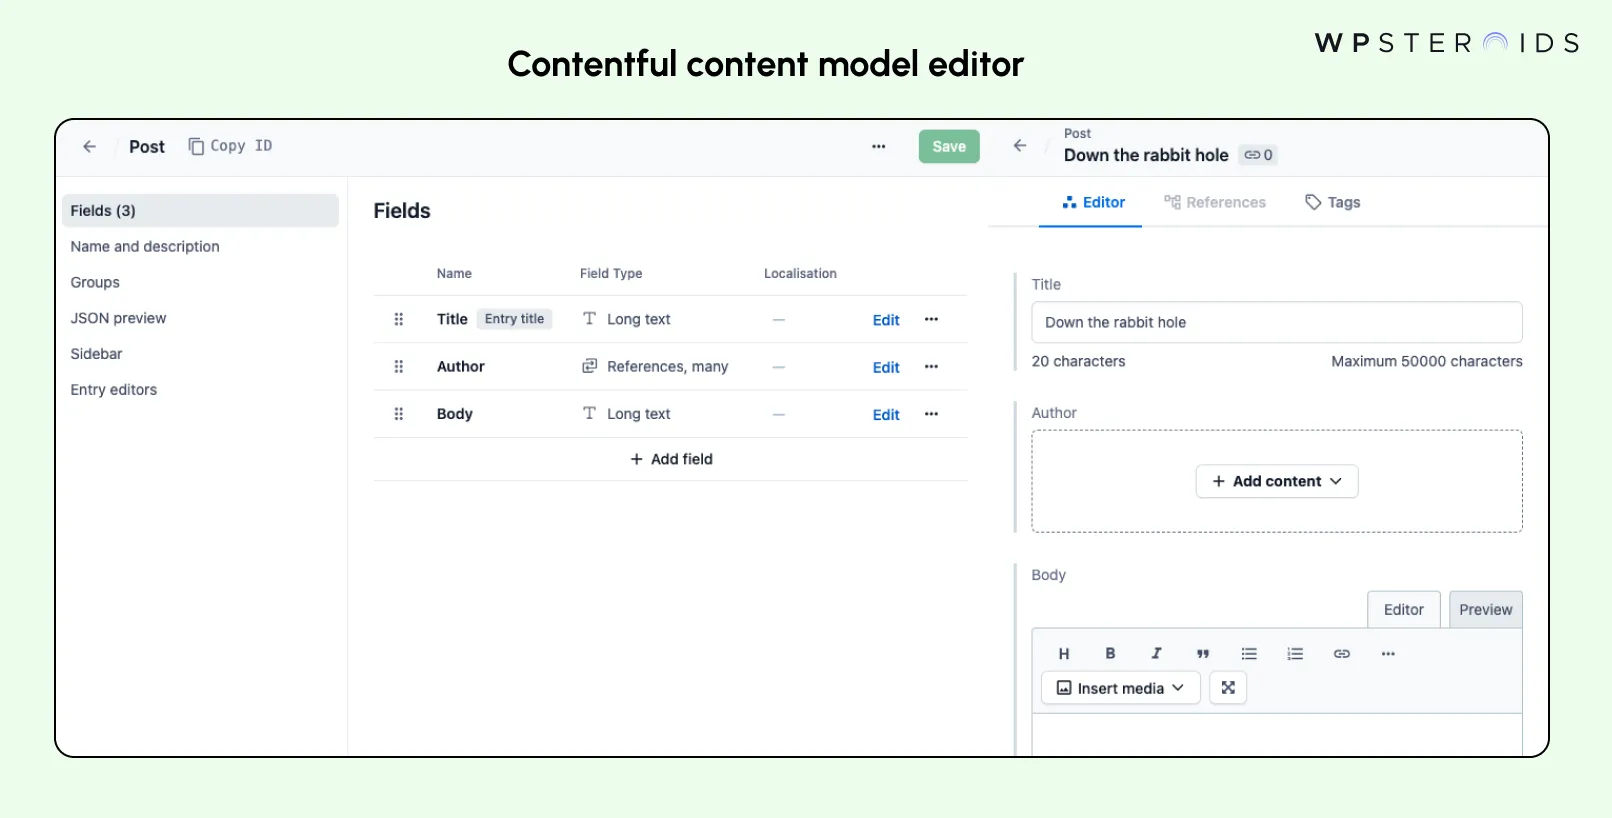
Based on your audit, decide how content will be organized in Contentful.
For example, if your old system forced writers to jump through hoops to add images, simplify it. Balance what editors need (easy-to-use fields) with what developers need (clean, reusable data).
You can either:
Both require planning. The key is to involve everyone—editors, developers, designers—so your new system works for the whole team.
Here, I am sharing with you the steps of Contentful Migration. However, these are the basic steps. If you already have an idea you can skip to the actual technical implementation.
Well, now that we’ve gone through the basic steps, let’s jump to how you will be writing scripts and building your logic bit-by-bit to implement the same process. I’ve also included code snippets so that you can take their help to customize your scripts
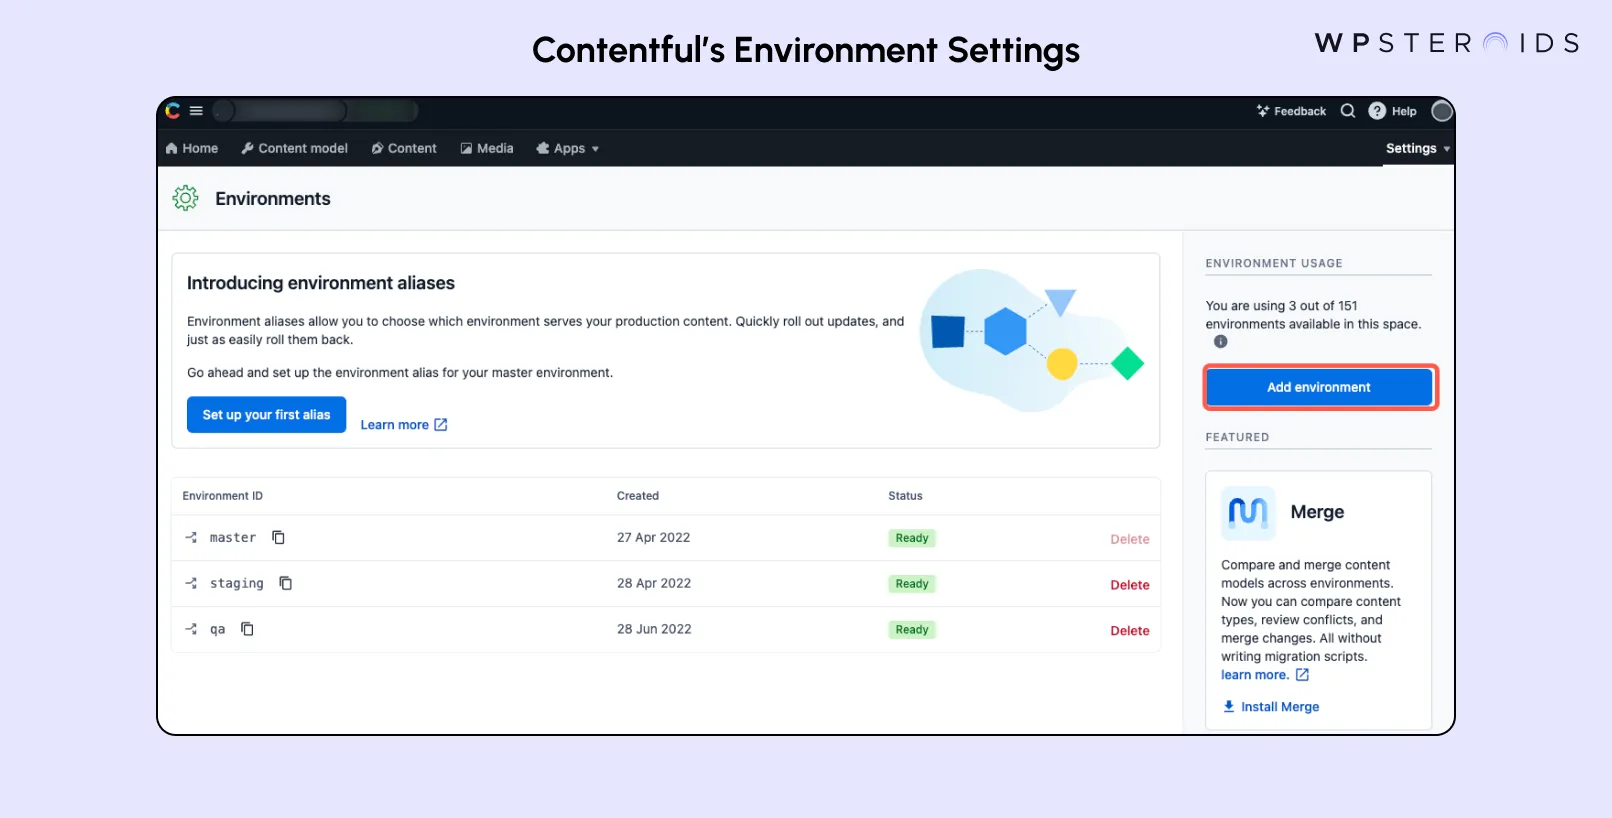
Step 1: Set Up Your Playground
You need a safe space to test scripts without breaking live content.
# Install the CLI
npm install -g contentful-cli

# Log in & pick your Contentful "workspace"
contentful login
contentful space use "your-space-id"

# Create a test environment (like a sandbox)
contentful space environment create --name "feature-1"
Step 2: Start Your Script File
All migrations begin with this basic structure.
// File: my-migration.js
module.exports = function (migration, { makeRequest }) {
 // Your code goes here! ↓
}; Step 3: Update Content Types
To add/remove fields in your content model.
// Edit the "blogpost" content type
const blogpost = migration.editContentType('blogpost');

// Add a new image field
blogpost
  .createField('mainImage')
  .name('Main Photo')
  .type('Link')
  .linkType('Asset');
Step 4: Add Rules to Fields
Ensure only valid data gets through (e.g., only images).
.validations([
  { 'linkMimetypeGroup': ['image'] } // Allow images ONLY
]);
Step 5: Move Data Between Fields
Copy old content into new fields.
migration.transformEntries({
contentType: 'blogpost',
from: ['oldImage'], // Old field
to: ['mainImage'], // New field
transformEntryForLocale: async (from, currentLocale) => {
// Skip if no image exists
if (!from.oldImage) return;
// Copy the image over
return { mainImage: from.oldImage[currentLocale] };
}
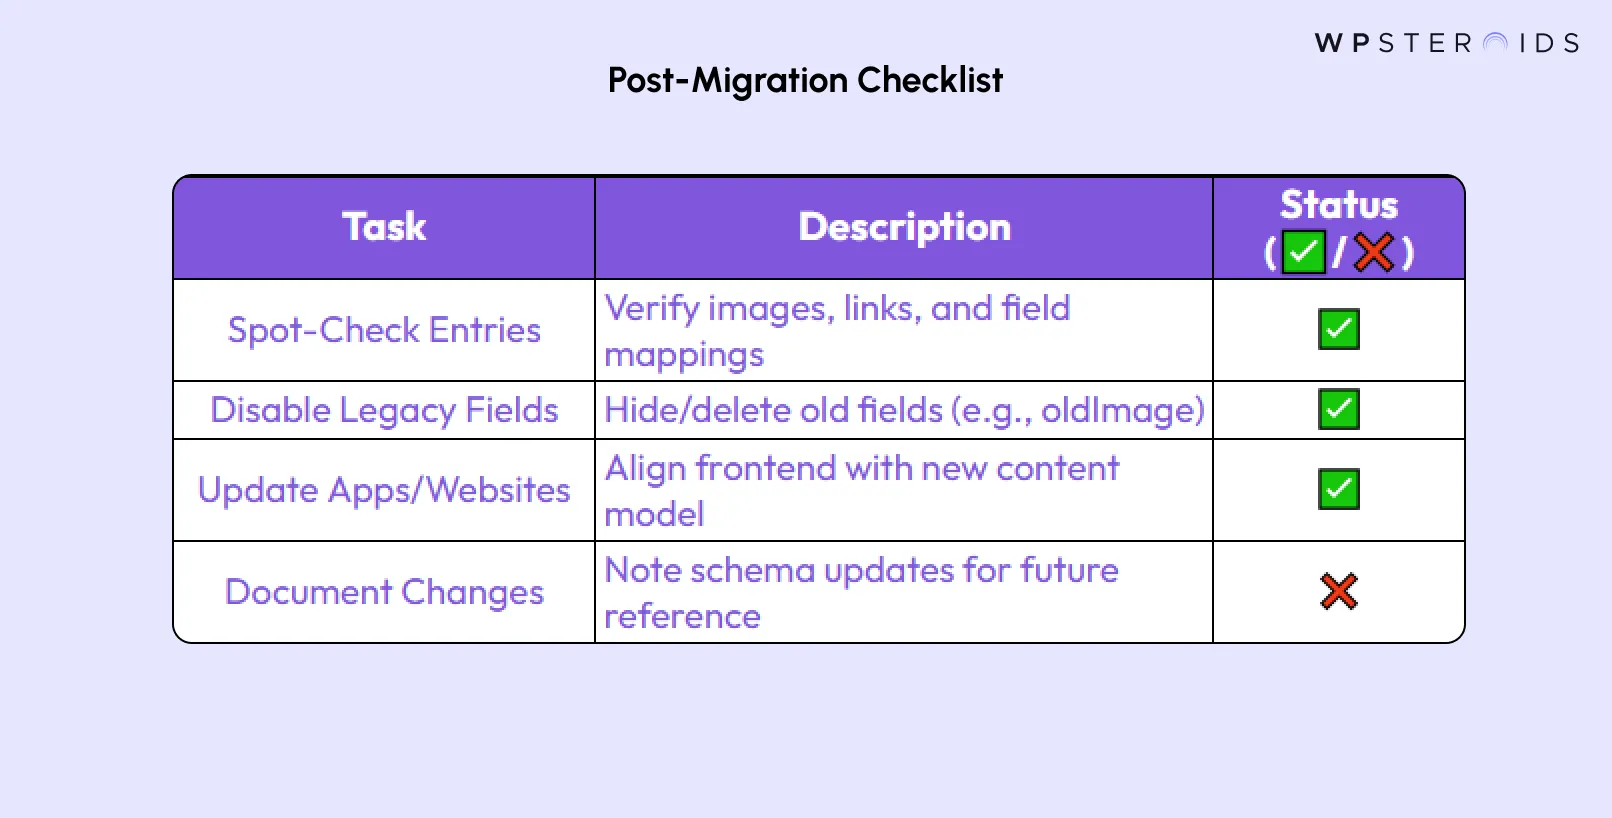
});Step 6: Tidy Up Old Fields
Avoid confusion by hiding/deleting unused fields.
 // Hide the old field from editors
blogpost.editField('oldImage').disabled(true);

// OR delete it permanently
blogpost.deleteField('oldImage');
Step 7: Run & Test Your Script
Test in your sandbox before touching real content.
contentful space migration --environment-id 'feature-1' my-migration.js Here’s a template of the complete script that you can use for Contentful migration. Of course, you can make the changes according to what suits you best.
.createField('mainImage')
.name('Main Image')
.type('Link')
.linkType('Asset')
.validations([
            {
                'linkMimetypeGroup': ['image']
            }
        ]);


    // Transform existing entries to match new structure
    migration.transformEntries({
        contentType: 'blogpost',
        from: ['image'],
        to: ['mainImage'],
        transformEntryForLocale: async (from, currentLocale) => {
            // Skip empty entries
            if (!from.image) {
                return;
            }

            // Get the ID of the linked image entry
            const imageEntryId = from.image[currentLocale].sys.id;

            try {
                // Fetch the linked image entry
                const imageEntry = await makeRequest({
                    method: 'GET',
                    url: `/entries/${imageEntryId}`
                });

                // Return the transformed data
                return {
                    mainImage: imageEntry.fields['image'][currentLocale]
                };
            } catch (error) {
                console.error(`Error processing entry ${imageEntryId}:`, error);
                return null;
            }
        }
    });

    // Disable old field after migration
    blogpost.editField('image').disabled(true);
};Always test scripts in a new environment (like `feature-1`) first. Once everything works, “go live” by pointing your main environment to the updated one—like flipping a switch.
Suppose you need to add a new value to a dropdown list (such as adding "RPG" to a list of game types). In Contentful, you can't simply append the new value—you must rewrite the whole list of permitted values.
This creates issues if another person is modifying the same list simultaneously. For instance, if you include "RPG" and another programmer includes "Tower Defense", whoever executes their script last will overwrite the other person's work.
module.exports = function (migration) {
  const rules = migration.editContentType("rules");
  const gameType = rules.editField("gameType");
  gameType.validations([
    { in: ["Casino", "Other", "Solitaire", "Trick Taking", "Rummy", "RPG"] }
  ]);
};
Another headache: Contentful doesn’t let you check the current schema during migrations. You can’t say, “Hey, what’s already here? Let me adjust that.” Instead, you have to hardcode every change, which risks breaking existing validations or losing data.
Contentful doesn't keep track of which migrations you've already run. If you accidentally rerun a script, it could break or—perish the thought—corrupt your content.
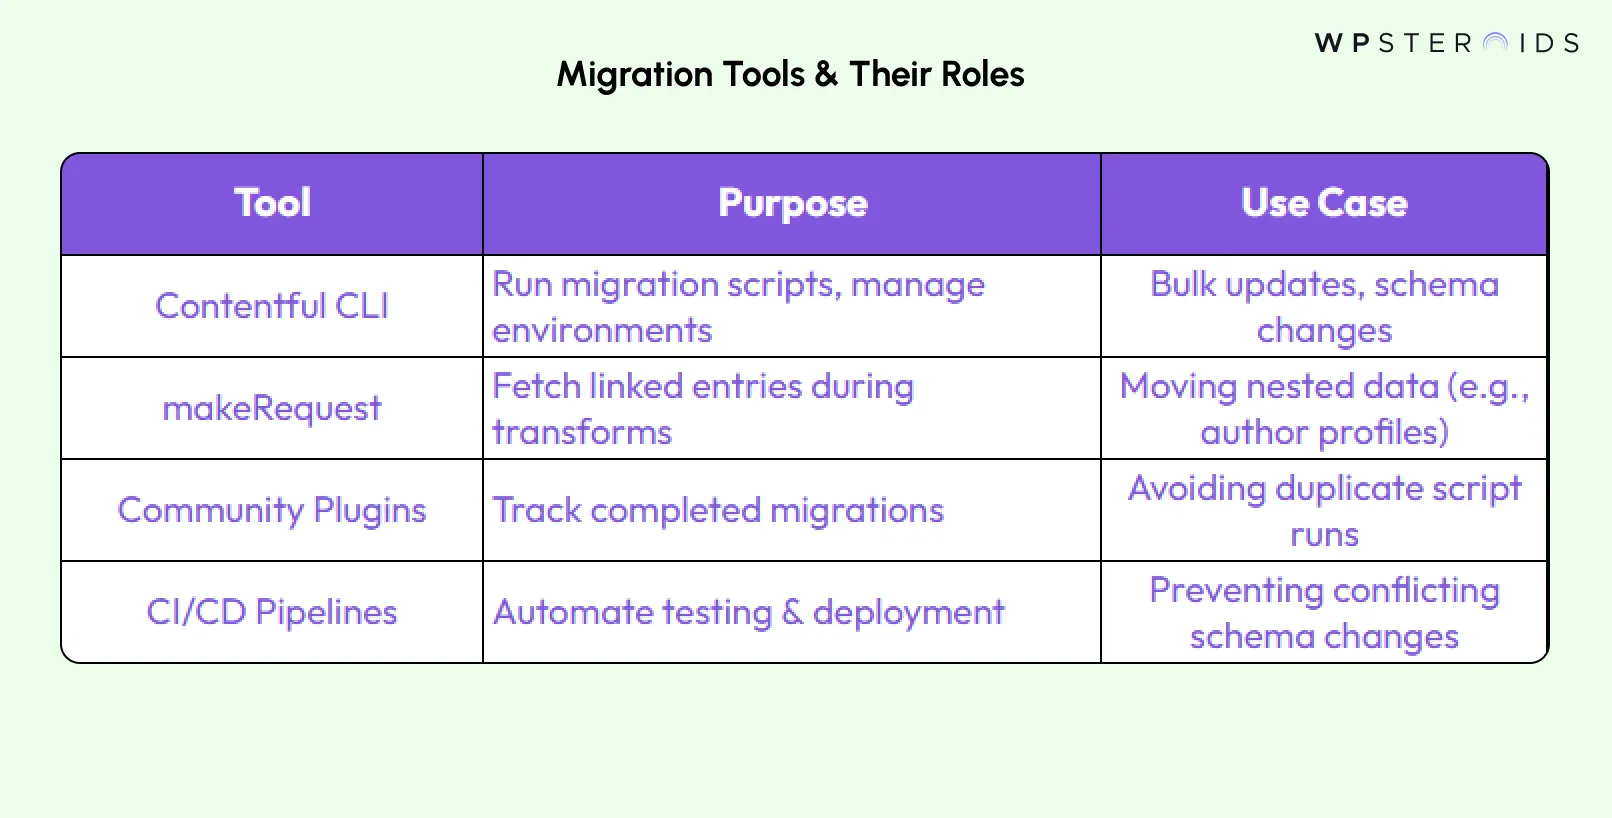
To avoid this, some people use custom plugins to log that migrations have already been applied. It's akin to leaving crumbs so you can avoid retracing your steps.
# Example using a custom script to track migrations
contentful-migrations up-- path contentful/migrationsOnce you’re sure the new system works, disable old fields (like `blogpost.image`) to avoid confusion. It’s like donating old furniture after a move—you don’t need it anymore.
blogpost.editField('image').disabled(true);Contentful migration isn’t a one-time fix. As your needs change, tweak your content model. Maybe add a new field for video embeds or simplify a clunky workflow.
Migrating to Contentful might feel like packing up a decade’s worth of stuff into boxes—tedious, but worth it once you’re settled. The key?
Plan ahead, test often, and don’t be afraid to toss what you don’t need. Use scripts to automate the heavy lifting, lean on tools like the CLI or community libraries to avoid mistakes, and always keep improving after the move.


